You can buy a tube of flesh, but it will never, ever match
anyone. You can use it as a basic pigment, and then modify it. Or you can make
your own basic mix.
Your Pallet.
White. Always start with white, even for black skin.
Titanium is a highly reflective paint. Most artist have this already on hand.
Portrait artists have traditional used flake white, which is a bit warmer, more
yellow white. Zinc white is more transparent and mixes well. This can be a plus
when mixing with other pigments. Any white you are familiar and comfortable
with can be used. You might want to try some new white.
Red. Any red will do. Red, although considered a warm
color comes in many hues, some warmer than others. While the cadmium reds are
quite warm, alizarin crimson is regarded as a rather cool red. If you choose
alizarin crimson make sure you get a permanent hue. Alizarin crimson has had
some permanency issues. Most modern, quality paints has solved this, but look
at the light fastness rating on anything you buy.
Yellow. Again, yellows do come in warm/cool version,
like lemon yellow and yellow ochre. You can use either, but it will effect the
final mix. Experiment and become familiar with each of your yellows. I
personally feel yellow ochre can ad a richness to several skin types that make
it worth having in your pallet box.
Green. Yes green. All skin types, colors, shades have
a touch of green in them. All, no exceptions. I learned this right out of high
school when I worked for a photo finisher. Their expert retoucher taught me how
to work on portraits. In those days (back at the end of the last ice age) when
we retouched a photograph, we literally did it, with pigmented inks. She always
“closed” an area she had retouched with green. She was both a skilled craftsman
and an artist. Without the green the tone is never right. Years later this was
confirmed by a very skilled and gifted portrait artist who only works in
watercolor and always lays down a layer of green before any other pigment for
faces.
On Your Pallet.
Always arrange your pallet the same way. I start left to
right with my warm colors then cooler.
White is in the upper left, below will be yellow, red
next to the white, then in this case orange, lastly green and blue.
Take a medium amount of white, about 2 nerdles ( a nerdle is
the amount you would put on your toothbrush)
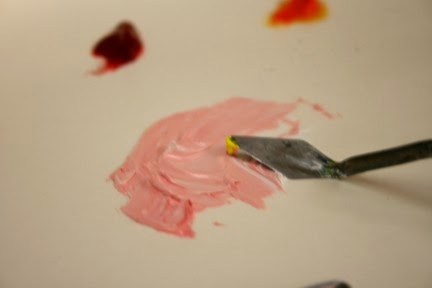
Always mix color into white, not white into the other colors. Taking the tip of your pallet knife move a small amount of white to an area to be mixed. With the tip of your pallet knife mix a med to light pink, this will depend on who you are painting, but start light! It is very easy to go dark, not so easy to go light. Mix with the back of the knife until well blended. Use another knife to scrap off the back of the first knife. This is your starting point.

When you have this mixed, blend in a small amount of yellow.
You will begin to see a light peach beginning to develop. If you need to go
darker add just a tip of red, then yellow to blend out a darker peach.
To tone this down. Dip just the tip of your pallet knife in the green and blend, blend, blend.
To tone this down. Dip just the tip of your pallet knife in the green and blend, blend, blend.
This should be your basic skin tone.
This is even true
for black skin.


No comments:
Post a Comment
Did you enjoy this post? I would love to hear from you