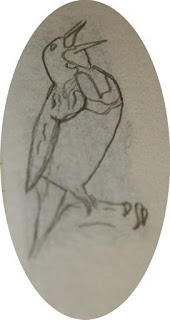
Preliminary sketches are just that, preliminary. You can concentrate on the overview, locating the major lights and darks, or you can isolate the objects/subjects you are interest in drawing. Preliminary sketches let you explore the details and analysis what you are really seeing. They can and should do a lot of things. Any really good work of art should have several preliminary sketches.
It is ok when you are out to do sketches of single objects. It is ok to do general landscapes. Sketches should be the way you explore the world around you, so be free with them. By sketching often, you can quickly come to understand how things really work.
Concentrate On That Object
When you have a subject that really interests you, concentrate on that. Draw it from many angles. Simplify it. Take it apart. Look for the basic shapes that make up that object.
This is true, even when using a photo reference. Or especially when using a photo reference. Photos can be misleading. Take the time to really explore what you are looking at. Don’t just jump into drawing it. Think. Art happens in the head, not on the paper. The paper just shows the results.
When using a photo reference, make a black and white copy of it. In fact, make several. Use a copy machine or print it from your computer on common paper, not good photo paper. These are working copies, not art. When you make your copies, lighten and darken the copy. Lighten the copy and even enlarging it will reveal details in the shadows that might be hard to see.
I tend to use my own digital photography for reference, so I have the files to play around with. Also I don't have to worry about copyright.
[note: never, ever work on the original file. Always do a “save as” and rename the file. Me, I put work at the beginning so I know this is the file to play with.]
With my software, I have several options to convert a photo to grayscale. (this is what you are actually doing, converting to true black and white is not what you want to do!)Usually I use the desaturate option, as this allows me to play with contrast. You will need to learn what is best with the software you have.
True Shapes
With these b&w copies, you are ready to work out construction problems. Here I am not talking about layout and composition, but how you are going to draw individual objects. One reason I like to make the copies of my references is that I can draw right on them. This is helpful in finding the true shape of something.
“I can see the shape” you say, but do you really? How many times have you drawn a vase, then look back at your still life and find you have not drawn that vase? Not so easy, is it?
 Ok now stop and think about drawing a bird or a squirrel. Looks can be deceiving! Try it, get a photo of a common bird or squirrel, then try and find the edges. Most photos tend to lose the details in shadows.
 So we have the black and whites. Here the lighter versions will be helpful. Draw the true shape of things. I like to use tracing paper for this. Lightly draw around the actual edges. Now look. Surprised? They are fatter/leaner than you thought. Using tracing paper isolates the shape from the rest of the context in the photo. It isolates it from distracting patterns and shadows. You will find this especially true with wildlife. Nature plans it this way. Remember their patterns are supposed to make it difficult to see their true outlines. It is a survival thing. Once you have the true shapes, it is easier to transfer this to your drawing.


No comments:
Post a Comment
Did you enjoy this post? I would love to hear from you