Monday, March 3, 2014

Working With Powdered Graphite

New purchase:  a jar of    powdered graphite.


For me a new idea.


Now what to do with it?


Start with a simple sketch, but soon that jar of graphite powder was calling me. A small round watercolor brush and a large rough boor flat and I was starting to experiment.


Starting with a face with powdered graphite.
 

I did use more than powered graphite, I used a 6B pencil to find the placement of the eyes and chin, and lightly sketched with a 2H pencil.


I have a stump of a 4B woodless pencil. I find this useful when I am thinking a lot and sketching. As well as my supply of graphite sticks. These are squares of graphite. These when used on their side give uneven marks, which I used for the foliage. When you use these, you cannot use them like conventional pencils, you need to change the way you hold them and this often changes the way you approach your work. This can lead to both a looser composition and surprisingly greater control.


Finished Sketch
A fat stump was used to pull some of the graphite around where I wanted it. This is very much a combination of drawing and painting.

While nothing I would considered "done" it is not bad for a first try. I can see the possibilities in this looser form of graphite.

Monday, February 24, 2014

Colored Pencil, Blending, Burnishing and Polishing

Finishing up a colored pencil painting is more than simply putting down the pencils.

Tools needed to finish,
Sandpaper pad,
 erasing shield,
 Chamois,
 burnishing pencil,
 stump,
 blending pencil,
 pencil eraser,
 paper towels,

Using a paper blender

smoothing the color out

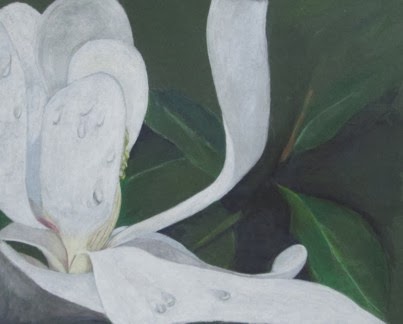
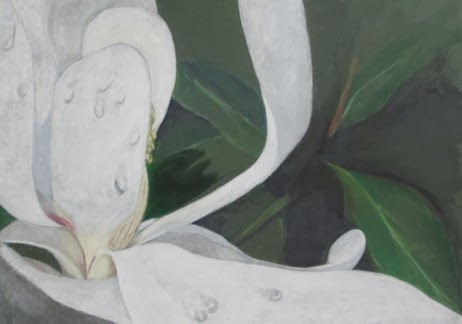
polished picture

Detail of flower

Monday, February 17, 2014

Magnolia Drawing, Working the Background

Finished background
While the background is not the focus of the drawing, it still requires strong attention.

We want the background to compliment and support the focus, not leave it hanging.

There are many ways to approach this.

You and simply have a mottled background, like the fuzzy blobs of color you get in a photograph, or you can put in enough details to suggest focus. What you do is up to you, but consider the response you want.

Many times I have heard artists and students say "its that way in the photo".

So?

Are you the photographer?

Are you simply copying the photo or creating a work of art?

Because of the shallow depth of field in the photograph (we will not go into that here,) most likely there is no detail available for the background.


If you have taken the photos yourself, you might start taking more than one photo, one focused on the object, one on the foreground and one on the background. If you have not done this, it is still up to you to supply the background.

Hint: it does not have to match the photo!

With the second magnolia I decided to take a different approach to the background.

watering the background
With the first, I simply put in some shading to suggest leaves. Highlighted a few and left the rest to the viewer to supply. In fact, this happens. A couple  of good leaves and a few dark shadows and people "see" the background leaves.

This time I wanted to suggest the leaves, but also to trigger a more painterly feel to the colored pencil painting. To this end, I used watercolor pencils, simply putting in blocks of color and using water and a brush to create the background.

As you can see, there really isn't much to the background. A few leaves, a suggestion of shape and highlights. Contrast does the rest.


Monday, February 10, 2014

Teaching Drawing - In the Snow

It is hard to teach a drawing class this winter. The bad weather just keeps coming! I think in January I had one complete class!

The standing policy of the Renaissance Art Gallery is that when Cabel County school are close due to bad weather, there are no classes at the gallery. Usually that means the road are bad, and because I draw students from around the Tri-state area, it simply is not safe enough.

This past January, schools have been closed a lot! Some of my students have only been to 4 days of classes since the year began! This also effect the ability of my adult students, some of whom are grandmas, and have to babysit if school is called off.

It has been very frustrating for both me and my students. They have projects they want to get on with.

Last week school was called off not because of snow, but of extreme cold. I needed to be in the gallery anyway to help prepare for a lobby show of gallery work in the Renaissance Center. We did a pre-show walk through for the opening of the play, "12 Angry Men" being given the first two weekends in February. So I let my students decide for themselves if they wanted to come in.

The Lobby show turned out rather well, and we are all geared up for the year.

Well this week, we were able to have classes. But it rained, snowed and the temperatures were all over the place! Those that made it in did enjoy themselves and really felt it was worth the trip!

February should be a better month, but none of us are counting on it. Last two months we have worked a lot in colored pencil and with the color wheel. In the coming months we will revert to working with graphite. In all its forms! And experimenting with different surface and treatments.

Back to basics!

Monday, February 3, 2014

Magnolia in Colored Pencil-On to the First Layer


Layer l
With the back ground blocked in , and the underpainting of the magnolia blossom dry, I will start on developing the whites. 

Filling in the back petals and the first layer of gray
White is the most reflective color and is never found in nature as pure white. It always, always, always reflects some of the colors surrounding it. These large blossoms are no exceptions. But for the first layer, a base of pure white Prisma Color is placed on the focus or most forward and prominent petals. 


These petals in life are large, glossy and slightly a creamy yellow. But only slightly. The brilliance of the white flowers is what makes these trees so beautiful. That and the fact that these flowers are the size of dinner plates! 

Finding the flow of the drawing
So a layer of white, even on the parts that will be shaded later gives a good base. 
 
At this point, you might be tempted to rush things, use long strokes to cover as much area as you can. Fight this!  Color pencil is not a fast medium. Yes it is try, but it takes time and skill to have it come out. Long linear strokes at this point will only cause trouble latter. They will create ridges you will have to fight to reduce and eliminate.
 
Use small circular or oval strokes to cover the area carefully. You want a smooth surface that will accept subsequent layers. Use light pressure. It is better to put two layers down instead of one thick layer that dents the surface and crushes the tooth of the support. 

The back or in this painting, supporting petals will be covered in 10% cool gray, also by Prisma Color.  With any white work, you really need a full range of grays, both warm and cool.

 
As the petals develop and open from the bud, the base is creamy yellow, even on the fully developed flowers. And as they age, and begin to fail, this yellow becomes more evident. I am using Cream, and French Gray, warm, 50%.
Close up of the developing flower,


Monday, January 27, 2014

Colored Pencil Drawing of Magnolia Blossom

Beginning Again

You can see the white outlines on this drawing

Another Magnolia Painting


Starting the third magnolia blossom painting in colored pencil.

Quite a few people have asked how I develop a colored pencil drawing/painting. So I decided to walk you through the steps as I draw this one.

First step is to draw the layout on tracing paper. Why? because it is hard to erase on mat board, also hard to see a drawing on dark mat board and very easy to erase and move things around on tracing paper.

So the layout is done. I don't go into great detail here, just basic shapes, Do I like it? etc.

Inktense pigments have been "floated" into the basic shapes
Then I turn the tracing paper over. On the back I will scribble white colored pencil. When that is one. I will use drafting dots (or artist dots, depending on where to buy them) and fix the tracing paper to where I want it on the board, leaving myself a wide margin. This can be trimmed away when finished, but gives me a place to do any "practice" strokes and color combos if I need to.

With the white side down, I take a fine point pen and gently trace over my drawing, transferring the basic design to the mat board. I know a lot of artist who do this in detail, but I prefer to let the details develop and see what happens.

I always have the detail preliminary drawing to refer back to, but I am not married to it.

With these fine white lines I am ready to beginning building this colored pencil painting. You can see the faint white lines that will become leaves later on in the painting process. I will ignore this for the time being.

With this painting I started with Derwents Inktense drawing pencils. These are water soluble pencils that give good coverage with an ink pigment. A flat watercolor brush and water gets these flowing to give a good base coverage. This layer is pale, it is only the beginning.

Monday, January 20, 2014

Magnolia-Blended, Burnished and Polished

Worked on the white magnolia colored pencils drawing.

Last week I used a solvent, mineral spirits to help blend the layers of pencil into a more smooth value transition. Using a stump rather than a brush, I blended the lighter whites into the darker shadows.

When dry I used both a pencil blender then burnisher.

Finally, I used both a paper towel and soft cloth to polish the drawing until it glowed and looked almost like an oil painting.

This is an un-enhanced photo taken in natural light of the completed drawing/painting.